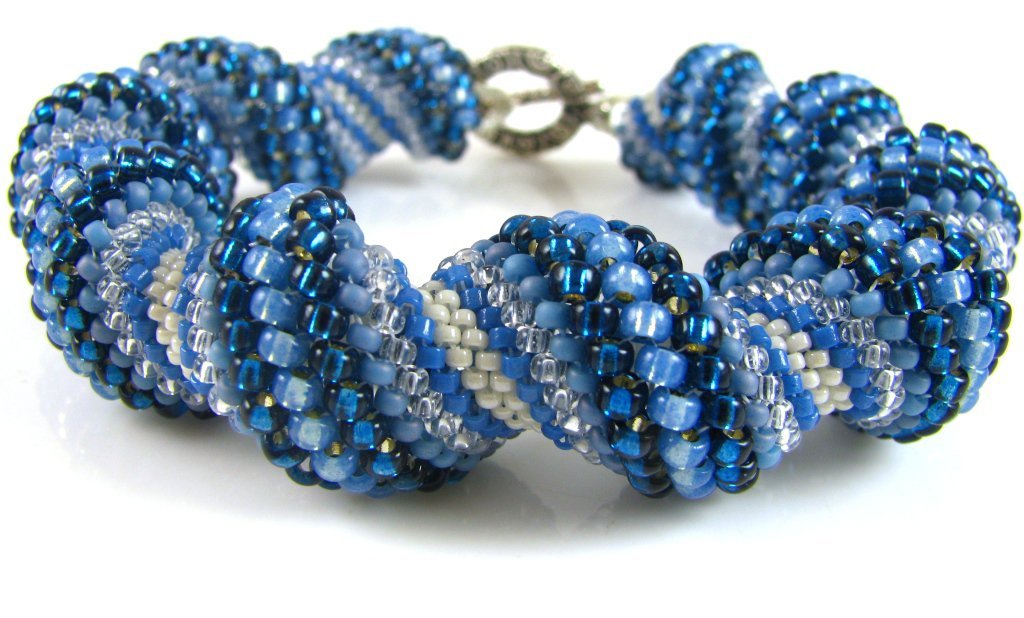
Explore the captivating world of bead weaving with the Cellini spiral stitch. This technique combines art and craft, making stunning bracelets that grab attention. The Cellini spiral, a twist on the tubular peyote stitch, offers endless creative possibilities for jewelry makers.
Bead enthusiasts adore the Cellini spiral for its flowing, three-dimensional look. It’s great for making bracelets that really stand out. The stitch forms a spiral pattern that wraps around the wrist, adding elegance and intrigue.
Whether you’re just starting with bead weaving or have lots of experience, the Cellini spiral is exciting. It’s flexible for simple designs but also complex enough to challenge skilled beaders. Let’s dive into this fascinating technique and learn how to make beautiful bead-woven bracelets.
Key Takeaways
- The Cellini spiral is a unique bead weaving technique
- It’s based on the tubular peyote stitch
- Ideal for creating eye-catching bracelets
- Offers both simplicity and complexity in design
- Allows for creative expression in jewelry making
- Suitable for beginners and experienced beaders alike
Understanding the Cellini Spiral Stitch Basics
The cellini spiral stitch is a fascinating bead weaving technique. It makes a unique spiral shape. This stitch is a twist on the tubular peyote stitch, opening up many possibilities for jewelry.
History and Origins of the Technique
This stitch is named after Benvenuto Cellini, a famous Italian goldsmith. It came into the beading world in the late 20th century. Its spiral design is inspired by Cellini’s metalwork, encouraging bead artists to explore new peyote stitching ways.
Core Characteristics of Cellini Spiral
The cellini spiral stitch is known for its coiled look. Beaders use beads of different sizes in a pattern to make a three-dimensional spiral. This method allows for smooth color and texture changes, making the pieces visually appealing.
Essential Materials and Tools
To begin your cellini spiral project, you’ll need:
- Seed beads in graduated sizes (usually 15/0, 11/0, and 8/0)
- Beading thread (like FireLine or Nymo)
- Beading needle
- Scissors
- Bead mat or tray
With these tools, you’re set to dive into the cellini spiral stitch. Using different bead sizes and colors will help you make eye-catching, spiral-shaped jewelry.
Required Materials for Creating Cellini Spiral Jewelry
To make beautiful Cellini spiral jewelry, you need certain materials. Seed beads are key, with different sizes creating the spiral look. Let’s look at what you’ll need for your projects.
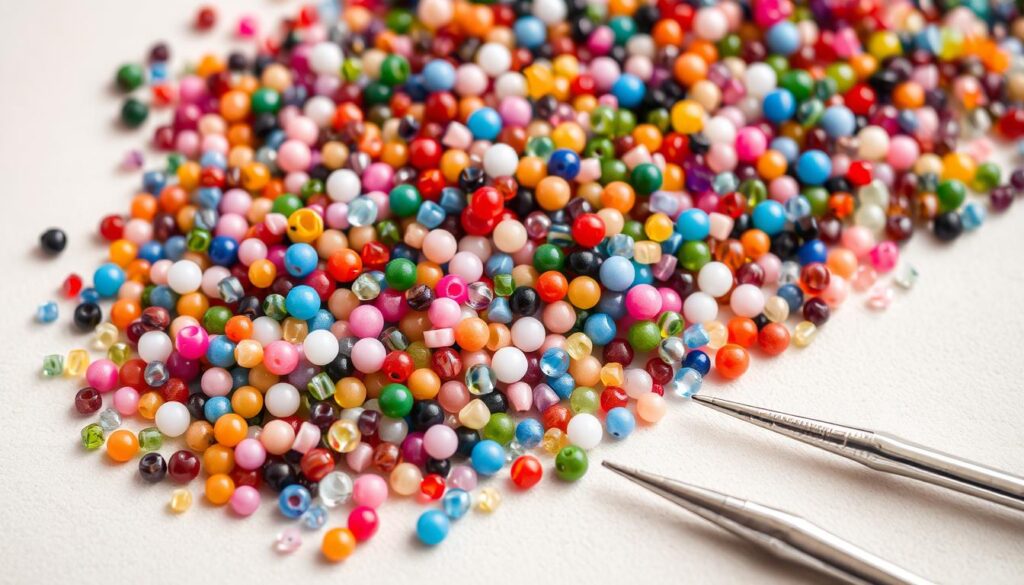
You’ll start with seed beads in various sizes. Sizes 11/0, 8/0, and 6/0 are best for the Cellini spiral. These sizes contrast to make the spiral pattern stand out.
Choosing the right thread is also crucial. Fireline and Nymo are top picks for their strength. Fireline fights fraying well, while Nymo is flexible and easy to use.
| Material | Recommended Options | Purpose |
|---|---|---|
| Seed Beads | Sizes 11/0, 8/0, 6/0 | Creating spiral pattern |
| Thread | Fireline, Nymo | Stringing beads |
| Needle | Beading needle (size 10-13) | Threading beads |
| Scissors | Sharp, fine-tipped | Cutting thread |
| Bead Mat | Felt or velvet | Workspace organization |
Make sure to get a beading needle that fits your thread and beads. A bead mat keeps your space tidy and beads from getting lost. With these tools, you’re set to start making your Cellini spiral jewelry.
Cellini Spiral Tubular: Step-by-Step Tutorial
Ready to start working a Cellini spiral? This beading tutorial will guide you through creating a stunning tubular design. The Cellini spiral technique combines elements of even count peyote with a unique twist, resulting in a mesmerizing spiral pattern.
Setting Up Your Workspace
Begin by organizing your beading area. Arrange your beads by size and color for easy access. Keep your needle, thread, and scissors within reach. A comfortable, well-lit space is crucial for maintaining tight tension throughout your project.
Starting the Base Row
Start with a ladder stitch base using your largest beads. This forms the foundation for your Cellini spiral. Secure your thread and work the first few rows in even count peyote stitch to establish the tube structure.
Building the Spiral Pattern
Now comes the fun part! Introduce your smaller beads in a graduated pattern. Pick up beads in descending size order, then work back up to the largest size. This creates the characteristic spiral effect. Repeat this sequence, maintaining consistent bead placement.
Maintaining Tension
Tight tension is key to a successful Cellini spiral. Pull your thread firmly after adding each bead, ensuring they sit snugly against previous rows. This helps create a sturdy, well-defined spiral shape that will hold its form beautifully.
With practice, you’ll master this captivating technique. Experiment with different bead sizes and colors to create your own unique Cellini spiral designs!
Selecting the Right Bead Sizes for Perfect Spirals
Making stunning Cellini spiral jewelry starts with picking the right bead sizes. The beauty of this technique is in the smooth transition between bead sizes. This creates a captivating spiral effect.
Understanding Bead Size Graduations
To make a perfect spiral, you need at least three different bead sizes. The biggest bead is usually the centerpiece. Smaller beads then form the spiral’s flow. Sizes 11/0, 8/0, and 6/0 seed beads are a common mix.
Optimal Bead Combinations
Try different bead sizes to get unique looks. Mix delica beads with larger seed beads for a tight spiral. Or, add bigger focal beads for a bold look. The goal is to keep the size change gradual.
Color Selection Strategies
Color is key to making your Cellini spiral stand out. Here are some tips:
- Monochromatic: Use different shades of one color for a subtle, elegant look
- Complementary: Choose colors opposite on the color wheel for striking contrast
- Ombré: Gradually shift from one color to another for a smooth transition
By picking the right bead sizes and colors, you’ll make stunning Cellini spiral designs. These will show off your creativity and skill.
Advanced Techniques and Pattern Variations
Mastering the Cellini spiral opens up a world of creative possibilities. Let’s explore some advanced techniques that will take your bead weaving to new heights.
Odd count spirals offer a unique twist on the classic design. By using an odd number of beads in each row, you create a subtle asymmetry that adds visual interest. This technique requires careful attention to bead placement but results in stunning, eye-catching patterns.
Decreasing and increasing your spiral width can create dramatic shape changes. To decrease, remove one bead from each row as you progress. For an increase, add an extra bead per row. These modifications allow you to craft tapered designs or create bold, flared sections in your piece.
Reverse spirals are another exciting variation. Instead of working in a continuous direction, alternate between clockwise and counterclockwise stitching. This technique produces a zigzag effect that’s both visually striking and texturally interesting.
Circular or endless designs take the Cellini spiral to its logical conclusion. By connecting the ends of your work, you can create seamless rings, bangles, or even intricate donut-shaped pendants. These circular pieces showcase the spiral’s beauty from every angle.
“The Cellini spiral is like a musical composition – once you know the basic notes, you can create endless variations.”
Experiment with these advanced techniques to push the boundaries of your bead weaving skills. Each variation offers new challenges and rewards, allowing you to create truly unique and captivating jewelry pieces.
Troubleshooting Common Cellini Spiral Issues
Making beautiful Cellini spiral jewelry can be tough. Let’s look at some common problems and how to solve them. This will help you get better at your craft.
Fixing Uneven Spirals
Uneven spirals come from beads not being placed the same way. To fix this, watch the shape and texture of each bead closely. Make sure to tie each stitch tightly to keep the shape even.
Tension Problems and Solutions
Getting the right tension is key for a good Cellini spiral. If your work feels too loose or tight, adjust the thread tension. Pull each stitch firmly but not so hard that it changes the shape of the tube.
| Tension Issue | Solution |
|---|---|
| Too loose | Increase thread tension, tighten stitches |
| Too tight | Relax thread tension, loosen stitches slightly |
| Uneven | Maintain consistent tension throughout |
Thread Management Tips
Good thread management stops tangles and keeps work flowing smoothly. Use a big-eyed needle for easy thread passes. When adding new thread, go through several beads before tying it off to keep the shape right.
- Use a thread conditioner to reduce tangling
- Work with manageable lengths of thread
- Secure knots tightly to maintain the tube’s integrity
By tackling these common problems, you’ll make stunning Cellini spiral pieces. They’ll have perfect texture and shape.
Creating Different Jewelry Pieces with Cellini Spiral
The Cellini spiral technique is a game-changer for jewelry makers. It lets you make everything from dainty bracelets to bold necklaces and special rings.
Bracelets and Bangles
Cellini spiral bracelets and bangles are loved by all. They have a fancy rope look that looks great on the wrist. You can change up the bead sizes and colors to make anything from slim bangles to big, bold ones.
Necklaces and Pendants
For necklaces, the Cellini spiral makes amazing rope-style chains or standout pendants. A long spiral tube makes a sleek, modern necklace. Short sections can be mixed with other techniques for more detailed designs. Pendants made this way add a cool, three-dimensional touch to any necklace.
Ring Designs
Cellini spiral rings have a bold, textured vibe. You can make wide band rings or thin, stackable ones. Choosing the right bead sizes lets you make rings that are comfy and show off the spiral pattern.
| Jewelry Type | Bead Count (approx.) | Difficulty Level |
|---|---|---|
| Bracelet | 300-500 | Beginner |
| Necklace | 800-1200 | Intermediate |
| Ring | 100-200 | Advanced |
Whether you’re making a fancy bangle or a striking necklace, the Cellini spiral opens up endless possibilities. Try out different bead mixes and sizes to find your own style and make pieces that stand out.
Tips for Professional-Looking Finishes
To make stunning Cellini spiral jewelry, pay close attention to detail. Use high-quality nylon thread for durability and smoothness. This keeps your jewelry soft and comfortable to wear.
Play with thread tensions to get it just right. Too tight, and it loses its softness. Too loose, and it’s not sturdy. Start with small samples to hone your skills before working on bigger pieces.
Choose focal beads wisely to add interest. These special beads can make your design stand out. Pick beads that match your spiral pattern well without overpowering it.
- Use a thread conditioner to prevent tangling and fraying
- Trim thread ends carefully and secure them inside beads
- Polish metal components for a cohesive, professional appearance
Feel free to try new things. Mix matte and glossy beads for texture, or add crystals for shine. The secret to a pro finish is in the details and consistency.
“The mark of a true artisan is not just in the design, but in the flawless execution of every detail.”
By following these tips, you’ll make Cellini spiral jewelry that looks amazing. It will also show off your unique style and skill.
Incorporating Multiple Colors and Textures
Ready to elevate your Cellini spiral designs? Let’s dive into mixing colors and textures for stunning jewelry. The right mix can make your pieces truly stand out.
Color Theory in Cellini Spiral Design
Color theory is crucial for beautiful Cellini spirals. Use complementary colors for striking designs or a monochromatic look for sleekness. Try various shades to find your favorite.
Mixing Bead Finishes
Don’t shy away from mixing bead finishes. Blend matte and glossy beads for depth, or add metallic for sparkle. This mix adds interest and depth to your designs.
Creating Custom Patterns
Show off your creativity with unique patterns. Mix bead sizes, colors, and textures for one-of-a-kind designs. The possibilities are endless, and you might surprise yourself with what you create!
FAQ
What is the Cellini spiral stitch?
The Cellini spiral stitch is a special bead weaving technique. It uses different bead sizes to make a spiral shape. It’s named after Benvenuto Cellini, an Italian goldsmith from the Renaissance. It’s great for making bracelets, necklaces, and other jewelry.
What materials do I need to make a Cellini spiral bracelet?
To make a Cellini spiral bracelet, you’ll need a few things. You’ll need seed beads in sizes 15, 11, and 8. You’ll also need beading thread, a needle, scissors, and a clasp. You can choose the bead sizes and colors based on your design.
Is Cellini spiral suitable for beginners?
Cellini spiral is a bit challenging for beginners. But, if you know some basic peyote stitch, you can learn it. Start with simple patterns and then try more complex ones as you get better.
How do I maintain tension in my Cellini spiral work?
Keeping tight tension is important for a good spiral. Pull your thread tight after each bead. Check your work often to make sure it’s firm. If it’s loose, you can tighten it by going through the piece again.
Can I use Cellini spiral for other jewelry besides bracelets?
Yes! You can use Cellini spiral for many types of jewelry. It’s great for necklaces, pendants, rings, and earrings. Its versatility makes it perfect for many designs.
How do I choose the right bead sizes for my Cellini spiral?
Choosing the right bead sizes is key for the spiral effect. Use at least three sizes, with the largest on the outside. A common mix is size 15, 11, and 8. Try different sizes to find your favorite look.
What’s the difference between even and odd count Cellini spiral?
Even count uses an even number of beads and is more common. Odd count uses an odd number and creates a different effect. Even count is easier for beginners, while odd count offers more design options for experts.
How can I fix an uneven spiral in my Cellini work?
If your spiral is uneven, check your tension first. Tightening loose spots can help. If it’s still uneven, you might need to start over and rebuild the spiral. With practice, you’ll get better at making even spirals.
Can I incorporate multiple colors in a Cellini spiral design?
Yes! Using multiple colors can make your design stunning. You can use different colors for different sizes, create gradients, or random patterns. Try different color combinations to make unique designs.
What type of thread is best for Cellini spiral projects?
Fireline and Nymo are both good choices for Cellini spiral. Fireline is strong and keeps the shape well. Nymo is flexible and easier to work with for some. Your choice depends on your project’s needs and your preference.