Explore the exciting world of Cubic Right Angle Weave (CRAW). This technique has become a hit in South Africa and around the globe. This guide will show you how to make beautiful beaded ropes using CRAW. They’re perfect for making unique jewelry that catches the eye.
CRAW is a flexible bead weaving method that lets your creativity shine. It’s great for both newbies and seasoned beaders. This step-by-step guide will help you get better at CRAW and open up new design options for your jewelry.
Get set to learn all about CRAW. You’ll find out how to pick the right beads and solve common problems. By the end of this tutorial, you’ll know how to make stunning beaded ropes. Your jewelry making skills will soar to new heights.
Key Takeaways
- CRAW is a popular beading technique in South Africa and worldwide
- The method is versatile and suitable for various jewelry designs
- Proper bead and thread selection is crucial for successful CRAW projects
- Mastering thread tension and path is key to creating sturdy structures
- CRAW allows for creative embellishments and design variations
Understanding CRAW Cubic Right Angle Weave Basics
CRAW, or Cubic Right Angle Weave, is a beading technique that makes stunning 3D structures. It uses beads and thread to form cube units. These units can be connected to make intricate designs. Let’s explore the basics you need to start with CRAW.
Essential Materials and Tools for CRAW
To start your CRAW journey, you’ll need these key items:
- Beads (size 11 seed beads work well)
- Beading thread
- Beading needle
- Scissors
- Bead mat or work surface
Choosing the Right Beads for Your Project
Choosing the right beads is key for your CRAW project. Size 11 seed beads are popular for their versatility. Think about these factors when picking beads:
| Bead Type | Pros | Cons |
|---|---|---|
| Seed Beads | Uniform size, wide color range | Can be small for beginners |
| Crystal Beads | Add sparkle, larger size | More expensive, heavier |
| Cube Beads | Create distinct edges | Limited color options |
Thread Selection and Preparation
Choosing the right thread is crucial for a successful CRAW project. Nylon or polyester threads are good because they’re strong and flexible. Wax your thread to prevent tangling and make it last longer. Cut a length that’s about 1.5 times your arm span for easy handling.
With these basics, you’re ready to start making beautiful CRAW designs. Remember, practice makes perfect. Don’t worry if your first tries aren’t perfect. Happy beading!
Getting Started with Your First Cube Unit
Ready to start with your first cube in Cubic Right Angle Weave (CRAW)? Let’s get going! The basic unit is key to your project, so it’s important to get it right.
First, thread your needle with a long piece of fishing line or beading thread. Add a stopper bead at the end to keep your work in place.
Next, use four beads to make the cube’s base. Thread them onto your needle and move them down to the stopper bead. Then, go through all four beads again to make a tight loop.
| Step | Action | Result |
|---|---|---|
| 1 | Thread 4 beads | Base of the cube |
| 2 | Pass through all beads again | Tight loop formation |
| 3 | Add 3 more beads | Cube sides |
| 4 | Join to base | Completed first cube |
Then, add three more beads to your needle. These will be the sides of your cube. Go through the last bead of your base loop, then the three new beads. Finally, go through the first bead of your base to join everything together.
Congratulations! You’ve made your first cube unit. This basic shape is the foundation of your CRAW project. Keep practicing until you’re comfortable before trying more complex designs.
Building the Foundation: Creating Your Initial Cube Structure
Making your first cube is key to getting good at Cubic Right Angle Weave (CRAW). This base sets the stage for your whole project. Let’s explore how to build a strong cube that will be the heart of your beadwork.
Establishing the Base Four Beads
Begin by threading four beads to make a square. This square will be the base of your cube. Leave a 6-inch tail for later. Then, pass through all four beads again to make it stronger.
Completing the First Cube Walls
To make the walls of your cube, add one bead at each corner of your base square. These beads will connect to form the top of your cube. Keep your thread tight to make sure your cube is even.
Securing Your Structure
After adding all four wall beads, secure your structure. Weave your thread through the top beads to connect them. This step is key for a stable base for your CRAW project.
- Double-check all connections
- Reinforce weak points
- Ensure even tension throughout
By following these steps, you’ll make a solid cube structure. This will be the foundation for your CRAW project. Remember, the more you practice, the better you’ll get at building these complex structures.
Mastering the Thread Path
The thread path is key in Cubic Right Angle Weave (CRAW). It shapes the strength and look of your beadwork. Let’s explore how to master this skill.
Thread Direction Basics
In CRAW, how you direct the thread matters a lot. Begin by going through beads in a steady pattern. Pull the thread softly to keep things in shape. Each stitch adds to the strength of your cube structure.
Perfecting Tension Control
Getting the tension right is crucial for a neat finish. If it’s too loose, your work looks messy. If it’s too tight, it might bend. Practice pulling the thread with the same force. Adjust as you go to keep your beads tight but flexible.
Navigating Entry and Exit Points
Knowing how to handle entry and exit points is essential for smooth CRAW work. When you leave a bead, think ahead to where you’ll go next. This planning helps keep your thread path clean and neat.
- Exit from corner beads for best stability
- Enter new beads at a slight angle for better thread coverage
- Double-check your path before pulling the thread through
By focusing on these points, you’ll make stunning, strong CRAW pieces. Remember, practice is key. Don’t worry if it takes time to get it right. Keep trying, and you’ll soon be weaving like a pro!
Advanced Techniques for Building Rope Length
Mastering CRAW opens up exciting possibilities for creating stunning rope designs. By learning advanced techniques, you can extend your work into longer ropes while keeping structural integrity intact. Let’s explore some methods to increase your rope length and enhance your beading skills.
To build longer ropes, focus on repeating the basic cube unit. Start by completing your initial row of cubes. Then, begin the next row by adding beads to the exposed edges of the previous row. This creates a continuous chain of cubes, forming a sturdy rope structure.
Maintain consistent tension as you stitch each new cube. This ensures your rope remains uniform throughout its length. Remember to reinforce connections between rows for added strength.
5 Steps to Extend Your Rope
- Complete a row of cubes
- Add beads to exposed edges
- Stitch new cubes to form next row
- Reinforce connections
- Repeat steps 1-4 for desired length
Experiment with different bead sizes and shapes to create unique textures along your rope. Incorporating larger beads at intervals can add visual interest and break up the pattern. For a sleek look, stick to uniform bead sizes throughout.
| Rope Style | Bead Size | Texture | Difficulty |
|---|---|---|---|
| Classic CRAW | 4mm | Smooth | Intermediate |
| Textured CRAW | Mixed | Varied | Advanced |
| Crystal CRAW | 4mm + crystals | Sparkly | Advanced |
As you grow more comfortable with the technique, challenge yourself to create longer ropes. With practice, you’ll develop the skills to craft impressive CRAW jewelry pieces that showcase your beading expertise.
Adding Dimensional Elements and Crystal Embellishments
Take your CRAW projects to new heights by adding dimensional elements and sparkling embellishments. This creative process allows you to design unique pieces that catch the eye and showcase your personal style.
Incorporating Size 11 Seed Beads
Size 11 seed beads are perfect for adding texture to your CRAW rope. Mix them with larger beads to create interesting patterns and depth. Thread these tiny beads between cube units or use them to form delicate fringes along the edges of your design.
Working with Multiple Color Combinations
Experiment with different color palettes to bring life to your CRAW projects. Try pairing complementary hues or create a gradient effect by blending similar shades. Remember, the right color combo can transform a simple rope into a stunning statement piece.
Creating Surface Designs
Surface designs add a whole new dimensional aspect to your CRAW work. Use crystals to create sparkly patterns on the cube faces. Arrange seed beads in geometric shapes or swirls for added interest. You can even incorporate small charms or dangles to make your component truly one-of-a-kind.
- Layer different bead sizes for depth
- Use contrasting colors to highlight patterns
- Add crystals for sparkle and dimension
- Experiment with textures and shapes
By mastering these techniques, you’ll be able to create complex, multi-dimensional CRAW designs that stand out. Let your imagination guide you as you explore endless possibilities in bead weaving artistry.
Troubleshooting Common CRAW Challenges
Mastering Cubic Right Angle Weave (CRAW) can be tricky. Let’s explore some helpful tips to overcome common obstacles you might face during your beading journey.
Fixing Loose Connections
Loose connections can confuse beginners. A comfortable grip and proper tension are key. Try this tip: gently pull your thread after each stitch to snug up the beads. This simple action can make a big difference in your final product.
Adjusting Uneven Tension
Uneven tension is a common issue you need to know about. It can lead to wonky shapes and unstable structures. To fix this, maintain consistent pressure as you weave. Practice makes perfect!
Recovering from Missing Stitches
Missing stitches can throw off your entire design. If you spot a gap, don’t panic! Here’s a helpful trick: use your needle to add an extra stitch where needed. It’s easier to fix as you go than to undo your work later.
| Challenge | Solution | Prevention |
|---|---|---|
| Loose Connections | Pull thread gently after each stitch | Maintain consistent tension |
| Uneven Tension | Practice consistent pressure | Use a tension tool |
| Missing Stitches | Add extra stitches where needed | Count beads regularly |
Remember, every beader faces these challenges. With patience and practice, you’ll soon feel comfortable tackling any CRAW project!
Design Variations and Creative Applications
CRAW opens up a world of creative possibilities in jewelry making. This versatile technique allows you to craft unique patterns and stunning pieces. Let’s explore some exciting ways to apply your newfound skills.
Bracelets are a popular choice for CRAW projects. You can create elegant rope-style bracelets or wide cuffs with intricate surface designs. Mix different bead sizes and colors to add depth and texture to your bracelet patterns.
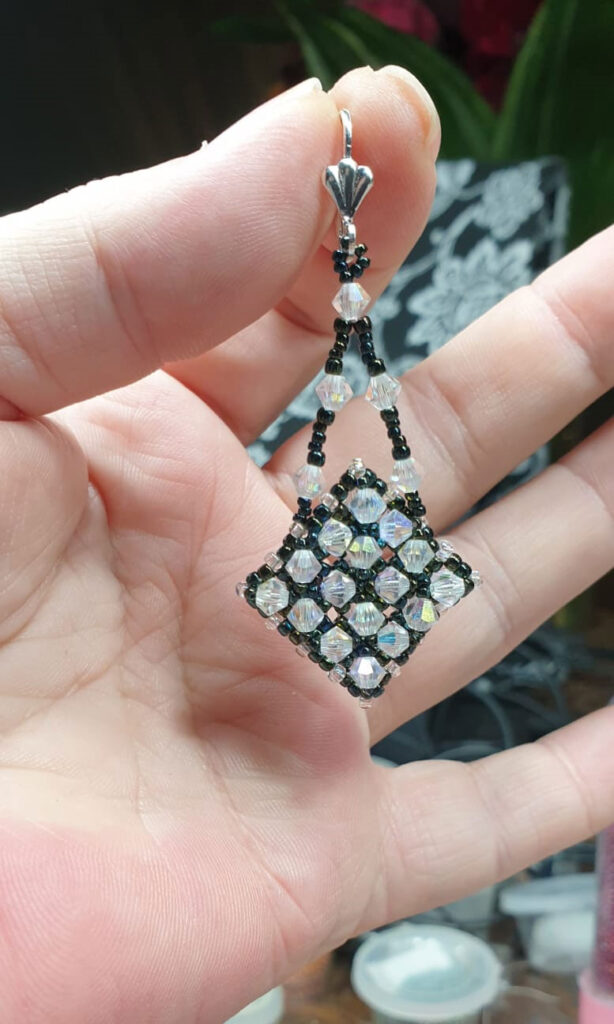
For necklaces, try crafting a CRAW collar or pendant. Use larger beads as focal points and surround them with smaller seed beads for a eye-catching effect. Earrings benefit from CRAW too – make dangling cubes or geometric shapes for a modern look.
- Rings: Create bold statement rings using CRAW techniques
- Pendants: Craft unique geometric shapes for eye-catching necklaces
- Beaded beads: Use CRAW to make large, hollow beads for other projects
Experiment with bead types in your CRAW beadwork. Combine crystals, pearls, and seed beads for luxurious patterns. Or use matte finish beads for a more subdued, elegant look in your jewelry pieces.
“CRAW allows me to express my creativity in ways I never imagined. It’s like sculpting with beads!”
Remember, practice makes perfect. Keep exploring new ideas and pushing the boundaries of what’s possible with cubic right angle weave. Your unique vision will shine through in every piece you create.
Conclusion
You’ve started an exciting journey to master Cubic Right Angle Weave (CRAW). This technique opens up many possibilities for your beadwork. You can make stunning ropes and intricate 3D structures.
Learning CRAW takes patience and practice. But it’s worth it because each stitch makes you closer to being a bead artist. Soon, you’ll make unique pieces that show off your creativity and skill.
Success in CRAW comes from keeping the right tension and following the thread path well. As you keep practicing, you’ll find your own style and preferences. That’s when the fun really starts!
So, grab your beads and thread, and dive into the world of CRAW. You’ll be amazed at what you can make with this technique. Happy beading!
FAQ
What is Cubic Right Angle Weave (CRAW)?
Cubic Right Angle Weave, or CRAW, is a beading technique. It makes three-dimensional structures. It’s great for beaded ropes, jewelry parts, and detailed designs.
What materials do I need to start CRAW?
To start CRAW, you need beads (size 11 seed beads are good), beading thread, a beading needle, and scissors. You might also use a bead mat and thread conditioner.
How do I create the first cube in CRAW?
Start with four beads in a loop for the first cube. Then, add beads to build the walls. Connect them to form a cube. Keep the tension even.
What’s the importance of thread path in CRAW?
The thread path is key in CRAW. It keeps the structure stable and looks good. Right thread direction and tension make the product neat and strong.
Can I use different bead sizes in CRAW?
Yes, you can use different bead sizes in CRAW. Size 11 seed beads are common, but you can add bigger beads or crystals for more look and depth.
How do I fix loose connections in my CRAW work?
To fix loose spots, go back through the area with your thread, pulling gently. You can also add stitches to make weak spots stronger.
Can I create flat designs with CRAW?
CRAW is usually for three-dimensional designs, but you can make flat ones. This is called “flat right angle weave.”
How do I add length to my CRAW rope?
To make your rope longer, just keep adding cube units. Connect each new unit to the last one. Keep the tension even.
What types of jewelry can I make with CRAW?
CRAW is very versatile. You can make bracelets, necklaces, earrings, and even three-dimensional pendants or parts for bigger pieces.
Are there any online resources to help me learn CRAW?
Yes, there are many online resources for CRAW. You can find step-by-step guides, YouTube videos, and beading forums. Experienced beaders share tips and patterns there.