Welcome to the world of beading! This guide is all about the tubular herringbone stitch. It’s a key skill for every beader. Whether you’re just starting or looking to improve, this tutorial will help you make beautiful beaded jewellery like necklaces and bracelets.
The tubular herringbone stitch, also called Ndebele stitch, is great for making flexible, rope-like designs. It’s loved for its ability to twist and fit into many designs. We’ll explore its history, uses, and what you need to get started. By the end, you’ll know how to make different designs and turn simple beads into beautiful art.
Key Takeaways
- Understanding the basics of the tubular herringbone stitch is key for making beaded jewellery.
- The stitch creates a flexible, rope-like structure perfect for many beading projects.
- This guide covers history, uses, materials, and step-by-step instruction for mastering the stitch.
- You’ll need different beads, threads, needles, and clasps as essential tools.
- Learn advanced techniques, how to fix problems, and make unique designs.
What is the Tubular Herringbone Stitch?
The tubular herringbone stitch is loved by many beaders. It makes a textured, flexible piece perfect for jewellery. To start, let’s look at its history and what it’s made of.
History and Origins
This stitch comes from Native American beadwork, with a rich history and cultural value. Over time, it has grown and mixed with other cultures, adding new styles. Now, it combines old and new beading, keeping its beauty in today’s jewellery.
Basic Structure and Components
The tubular herringbone stitch is about linking beads in rows to make a tube. Each row adds to the last, making a smooth pattern. This way, it’s strong yet flexible, great for many jewellery types. The key parts are:
- Beads: Usually seed beads, but other types can also be used.
- Thread: Strong, flexible beading thread.
- Needles: Fine needles to string beads easily.
Applications in Jewellery
This stitch is great for many jewellery pieces. It works well for bracelets and necklaces, and can be changed to fit different styles. You can play with different bead shapes and sizes to make unique pieces. It’s perfect for making everything from simple bracelets to fancy necklaces.
Materials Needed for Tubular Herringbone Stitch
The Tubular Herringbone Stitch needs different materials for a stunning design. Each item, from beads to threads, is key in beading. Here’s a list of what you’ll need to start.
Types of Beads: Seed Beads, Miyuki, Czech Glass, and More
Picking the right bead is vital for the Tubular Herringbone Stitch. Seed beads are top picks because of their uniform size. Miyuki beads, from Japan, are known for their precision. Czech glass beads offer a wide range of colours and finishes, adding a special touch.
- Seed Beads: Uniform size and shape, perfect for intricate patterns.
- Miyuki Beads: Highly precise and consistent, ideal for delicate designs.
- Czech Glass Beads: Available in various colours and finishes, adding uniqueness.
Essential Tools: Threads, Needles, and Clasps
You’ll need a few key tools for the Tubular Herringbone Stitch. The right threads are durable and flexible. Thin, strong needles are needed to go through beads without breaking. Clasps keep your jewellery secure.
| Tool | Description |
|---|---|
| Threads | Durable and flexible threads are essential for beading projects. |
| Needles | Thin, strong needles are crucial for passing through beads multiple times. |
| Clasps | Secures the finished jewellery piece, ensuring it stays in place. |
Optional Embellishments
Adding embellishments can make your beaded piece unique. You can use charms, crystals, or different beads. These extras let you express your creativity and make your jewellery special.
- Charms: Adds personal significance to your design.
- Crystals: Provides sparkle and elegance.
- Additional Bead Types: Allows for creative diversity and detail.
Step-by-Step Guide to Begin Tubular Herringbone Stitch
Starting with the tubular herringbone stitch means knowing the basics. This guide will show you how to start, from making a ladder stitch base to adding the first row. You’ll also learn how to add thread smoothly to keep your project looking great.
Creating the Ladder Stitch Base
To start a tubular herringbone stitch project, you need a ladder stitch base. This base is key for a solid foundation. Start by threading your needle with enough beading thread. Then, add two beads and go back through the first one.
Keep adding pairs of beads and go back through each pair. This will make your base the right length.
Starting the First Row
With your ladder stitch base done, it’s time for the first row. Pick up two beads and stitch down through the next bead in the base. Then, go up through the next bead.
This makes the herringbone pattern. Keep doing this around the whole base.
Continuing the Pattern
After the first row, keep going with the pattern. Add two beads at a time. Go down through the bead below and up through the next one.
This builds the height of your tube. Keep your stitches even for a neat design.
Adding New Threads
When you need more thread, adding it right is key. To do this, weave the thread through several beads to secure it. Then, cut off the extra.
Start with a new thread by weaving it into the beads. Keep going with your stitching. Make sure the thread change is smooth.
Forming the Tubular Shape
To turn a flat herringbone canvas into a stunning tubular shape, focus on key techniques. These steps will help you join ends, bead in rounds, and add twists for unique designs.
Joining Ends Together to Create a Tube
To start, join the ends of your flat herringbone strip together. Line up both edges and thread your needle through matching beads on each end. This makes a smooth connection, forming the tube’s base.
Beading in Rounds
After joining the ends, keep beading in rounds. Add beads to keep the herringbone pattern going in a circle. Keeping the tension even is key to a smooth tube with no bumps.
Twisting and Shaping Techniques
For a creative touch, use twisting and shaping techniques. You can twist the tube gently or add small rounds for a spiral look. These methods make your beadwork stand out and offer endless design options.
Tips for Designing with Tubular Herringbone Stitch
Making beautiful jewellery with the tubular herringbone stitch is fun and rewarding. Getting inspiration from various places can help you create a unique design. Here are some key tips for your project:
- Choosing the Right Colour: Picking the right colour is key for your jewellery’s look. Mix colours that go well together or use shades from the same family. This makes your jewellery look great and consistent.
- Developing a Pattern: Think about the pattern you want, whether simple or complex. Patterns make your jewellery interesting and add depth.
- Mastering the Technique: The tubular herringbone stitch needs smooth, even beads for a neat look. Practice to make your designs look professional.
- Experimentation: Try new things with different techniques and materials. Use Miyuki or Czech glass beads with your stitch for a unique look.
- Planning Your Project: Have a clear plan before you start. Sketch your design and get all your materials ready for a smooth process.
Using these tips helps designers get the most out of the tubular herringbone stitch. Start with the basics and add more complex elements to improve your jewellery.
Creating Different Projects Using Tubular Herringbone Stitch
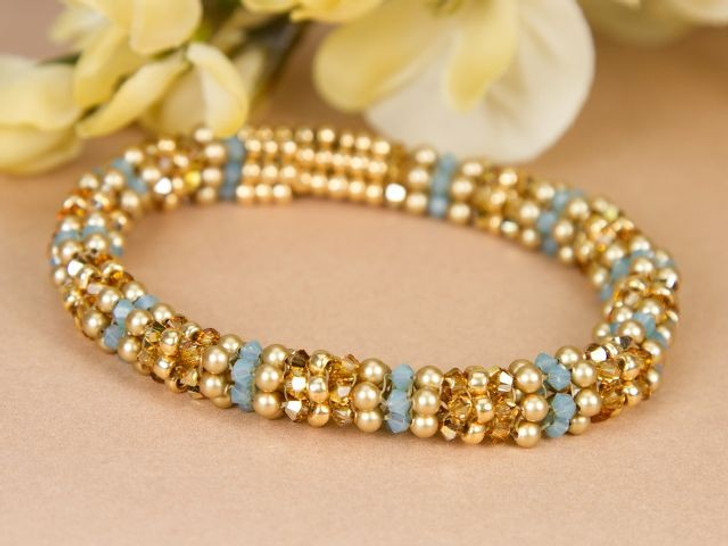
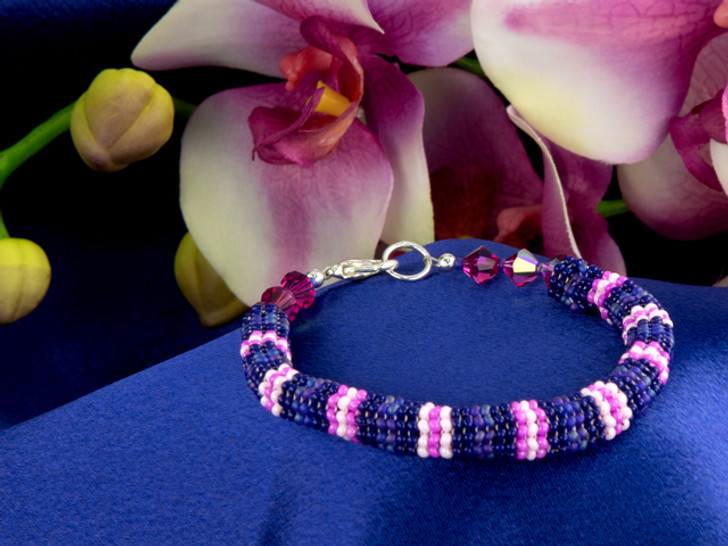
The tubular herringbone stitch is very versatile. It’s great for making a variety of projects. You can make a beautiful necklace or a striking bracelet. This technique lets you be creative in your beading.
- Necklaces: This stitch is perfect for a stylish necklace. Try different bead sizes and colours for a unique look.
- Bracelets: You can make a flexible yet strong bracelet. It’s great for adding charms or extra details.
- Pendants: Create a standout pendant using this stitch. It looks amazing on a simple chain necklace.
- Earrings: Make elegant earrings with small tubes and hooks. They have a detailed yet cohesive design.
Here’s a comparison to help you pick your first project:
| Project | Difficulty Level | Materials Required | Time to Complete |
|---|---|---|---|
| Necklace | Intermediate | Seed beads, clasp, thread, needle | 3-5 hours |
| Bracelet | Beginner | Seed beads, clasp, thread, needle | 2-3 hours |
| Pendant | Intermediate | Seed beads, pendant base, thread, needle | 1-2 hours |
| Earrings | Advanced | Seed beads, earring hooks, thread, needle | 1-2 hours |
With the tubular herringbone stitch, you can make many intricate necklace and bracelet designs. Each one shows off your personal style. This stitch lets you explore new ideas, making every project special.
Common Mistakes and Troubleshooting
Making beautiful beadwork with the tubular herringbone stitch is fun. But, even experienced beaders can make mistakes. Fixing these problems quickly saves time and reduces stress.
Twisting the beadwork is a common error. It leads to uneven tension and a wrong shape. To fix this, keep the tension even and adjust any beads that are not right.
Thread breaking or fraying is another problem. It can mess up your whole project. Use good thread like FireLine or Nymo. Also, waxing your thread before starting can help.
Skipping beads is a mistake that beginners often make. It causes gaps and an uneven pattern. To avoid this, count the beads in each row carefully and check your work often.
Joining ends together can be tricky. Make sure both ends of the tube are lined up before stitching them. This keeps the tube strong.
Here’s a table with common mistakes and how to fix them:
| Common Mistake | Troubleshooting Tip |
|---|---|
| Twisting of beadwork | Maintain consistent tension and adjust beads frequently |
| Thread breaking or fraying | Use high-quality thread and wax it before use |
| Skipping beads | Count beads in every row and double-check your work |
| Difficulty joining ends | Align ends properly before stitching them together |
Remember these tips to avoid common problems with the tubular herringbone stitch. This will make your beading journey smoother and more fun.
Advanced Techniques and Variations
Ready to take your beading to the next level? This section dives into advanced techniques for Tubular Herringbone Stitch designs. You’ll learn about using multiple colours, different bead shapes, and attaching ends securely. These tips are for seasoned beaders looking to refine and personalise their work.
Using Multiple Colours and Patterns
Adding different colours to your Tubular Herringbone Stitch can make it pop. Techniques like gradient transitions and alternating colour rows can transform a simple piece into a stunning artwork. Plan your design carefully to blend colours and patterns smoothly.
Incorporating Different Bead Shapes
Try using various bead shapes to add texture and interest to your stitch. Round, cube, and triangular beads each offer a unique look. Mixing shapes can make your project truly stand out. Experiment to find the perfect combination for your vision.
Attaching End Components
The last step is attaching end components that secure and enhance your piece. This requires precision and knowledge of different techniques. Make sure the ends are securely attached for a professional finish.
| Technique | Skills Needed | Benefits |
|---|---|---|
| Using Multiple Colours | Intermediate to Advanced | Enriches visual appeal |
| Incorporating Bead Shapes | Advanced | Adds texture and depth |
| Attaching End Components | Advanced | Ensures secure and professional finish |
Conclusion
Learning the tubular herringbone stitch has been a rewarding experience. It’s a key beading skill that helps you make stunning designs. It’s perfect for both beginners and seasoned bead lovers.
By following the steps and using the right materials, you can make many projects. These projects show off your creativity.
The tubular herringbone stitch is very flexible. You can make simple bead tubes or try out complex patterns. You can even use different bead shapes to add variety.
Using Miyuki beads for their uniform look or Czech glass for its artistic feel is exciting. The possibilities are endless.
This guide will be a valuable resource for your future beading projects. Keep learning, trying new things, and improving your skills. Beading is a vast and friendly world. With the tubular herringbone stitch, you’re ready to make beautiful, unique pieces. Happy beading!
FAQ
What types of beads are best for Tubular Herringbone Stitch?
Seed beads, especially Miyuki, are great for this stitch. Czech glass beads also work well, offering various shapes and sizes. The type of bead you choose can change how your project looks.
How do you start a Tubular Herringbone Stitch?
Start with a ladder stitch base. Then, begin the herringbone pattern. Our guide will show you how to do this step by step.
How do I maintain consistent tension when beading in rounds?
Keeping tension even is key for a smooth shape. Pull your thread tight after each bead. A bead mat helps keep beads in place, making tension easier to manage.
What tools and materials are essential for Tubular Herringbone Stitch?
You’ll need beading thread, needles, and clasps. Fireline thread is durable for this technique. Choose a needle that fits the beads well. Adding metallic or pearl beads can make your design stand out.
How can I add new threads without disturbing the pattern?
Add new threads carefully to keep the pattern right. Weave the new thread through beads until it’s secure. Small knots in hidden spots can also help.
How do you join the ends together to form a tube?
When you’re done, join the ends with a ladder stitch. Then, bead around the join to make a seamless tube. This makes your rope look continuous and smooth.
What are common mistakes to avoid when using the Tubular Herringbone Stitch?
Avoid uneven tension and wrong bead placement. Make sure each bead is added correctly and tension is even. This keeps your shape right.
Can I use different bead shapes with the Tubular Herringbone Stitch?
Yes, using different shapes adds texture and interest. Try drops, cubes, and triangles for unique looks. Just make sure the sizes match for a uniform pattern.
How do I attach end components to a finished piece?
Sew clasps or chains to the ends securely. Use matching threads and weave through several beads for a strong finish. A bit of jewellery glue can add extra hold.
What advanced techniques can enhance my Tubular Herringbone Stitch projects?
Try using multiple colours for complex patterns, different shapes for texture, and metallic or pearl beads for flair. These techniques make your jewellery unique and stunning.